Connecting Xero to Power BI
Power BI for Xero
Power BI is a unified, scalable platform for self-service and enterprise business intelligence (BI). Connect to and visualize any data, and seamlessly infuse the visuals into the apps you use every day.
Xero Software is a cloud-based accounting system, especially for growing and small businesses. It offers tools like bank reconciliation, purchasing, managing invoicing, inventory, expenses, bookkeeping, and many others.
Connecting Xero to Power BI via Odata Connection
Follow the steps below to connect Xero to Power BI
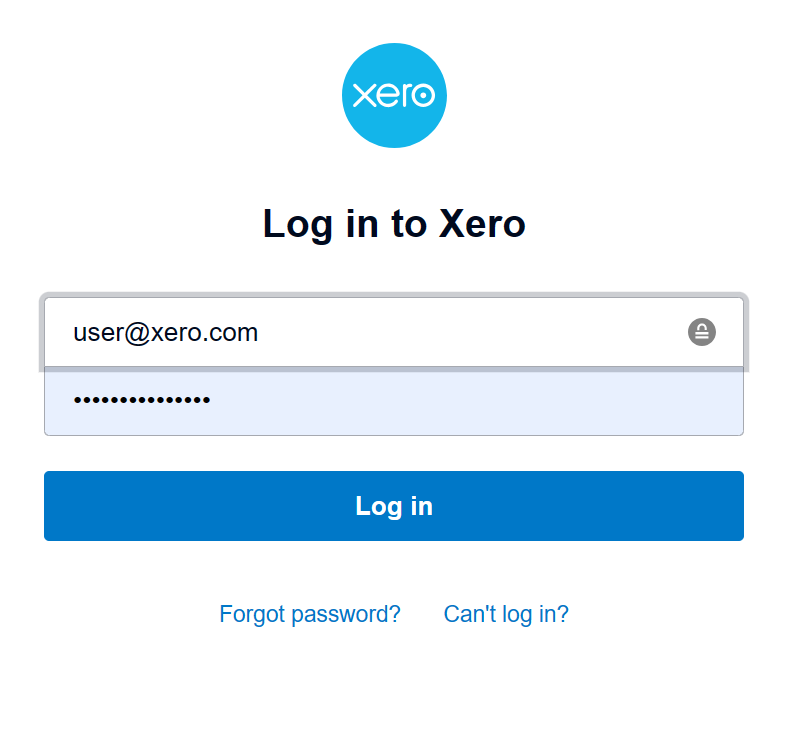
1. Log in to your Xero account.
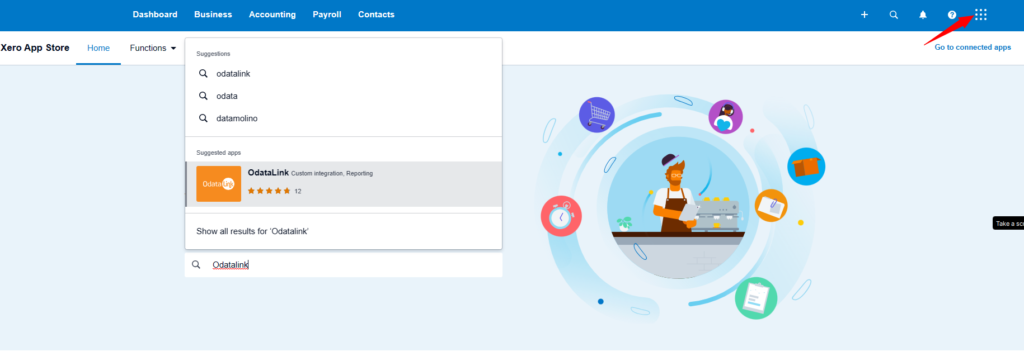
2. Click the connected apps icon on the upper right side of your screen. Search and get OData Link.
3. Click Get the App

4. You will automatically be logged in OdataLink home page. Click OData Feeds to create the link to be used for Power BI
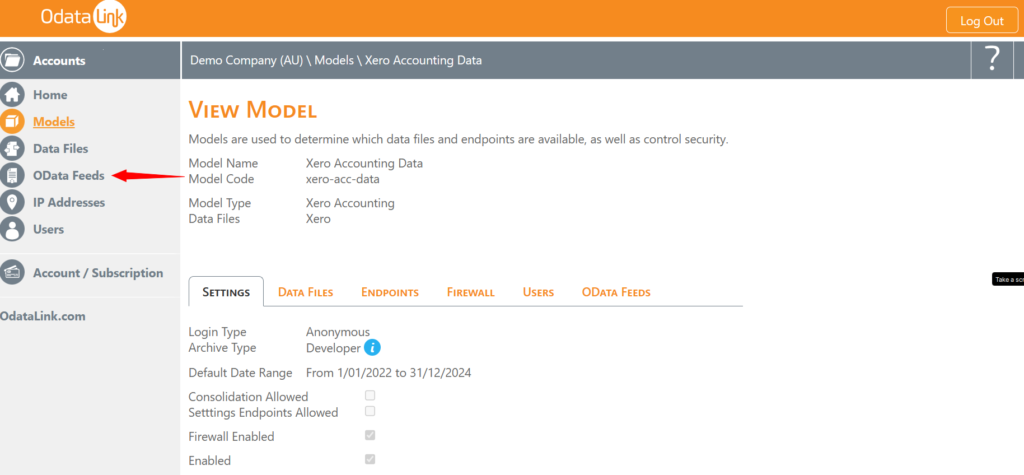
5. Click copy on the Xero Odata link

The Odata link is now ready for connecting to your Power BI data source.
How to Connect Odata in Power BI
Requirement: Microsoft Power BI Desktop application
6. Download PBI Desktop Microsoft Power BI Desktop

7. Choose the first file to download. Click Next
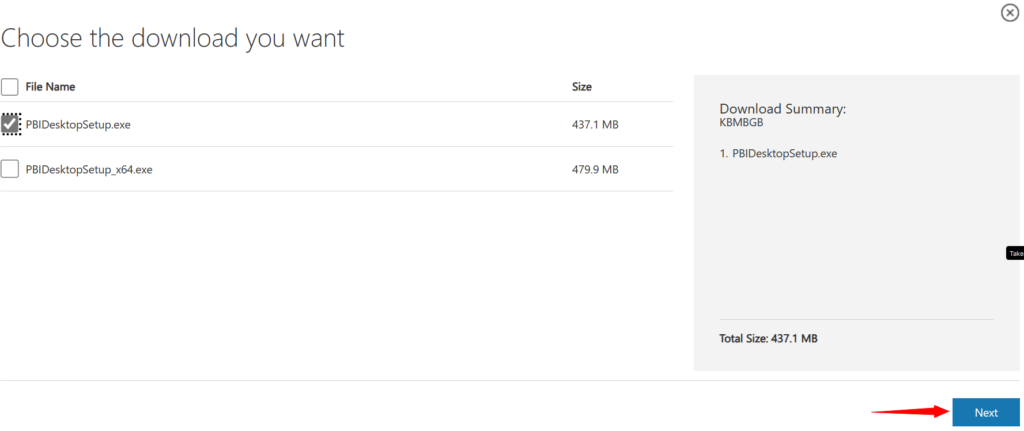
8. The setup file will automatically be downloaded
9. Open the file to install Power BI Desktop
We can now proceed on connecting Odata in Power BI
10. Download the Xero Report pbix file provided from this link
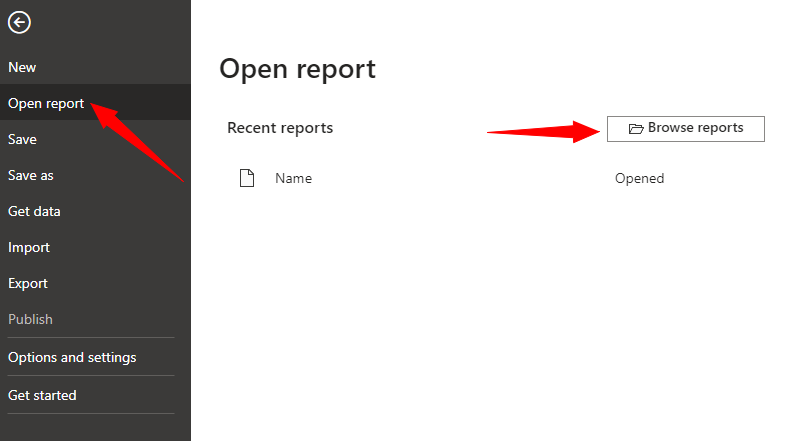
11. Open the downloaded file from the PowerBI Desktop Application. Click File then Browse Reports.

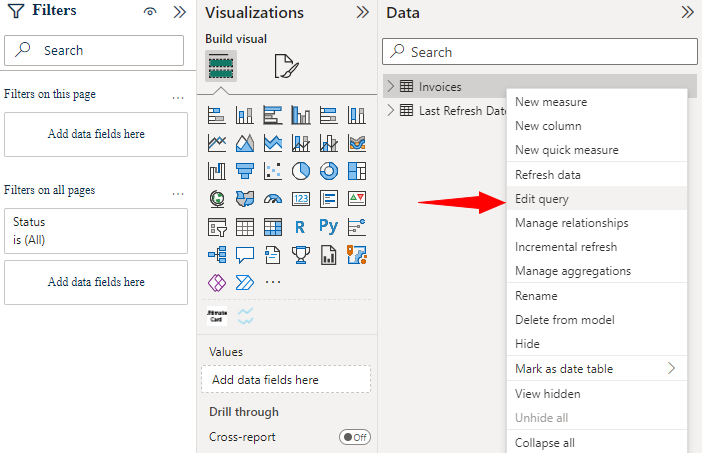
12. From the Data group in the Visuals page, hover on the Invoices table then right click on the More Options button (icon with the 3 dots3)

13. Select Edit Query, to update the OData link
14. From the Home tab, click the Data Source Settings

15. Click Change Source
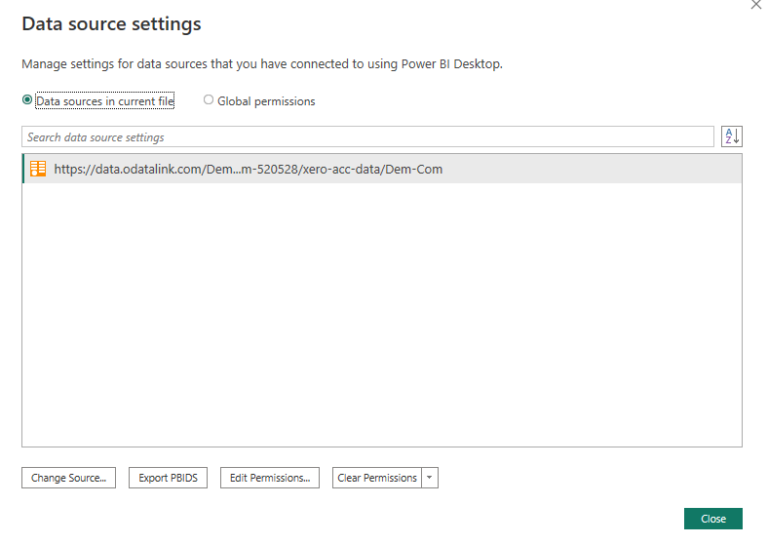
16. Delete the existing URL path and paste the Odata link that was copied in step 5 (Part I) and click OK.

17. Click Close and Apply. The data from your own source is now loaded to Power BI.

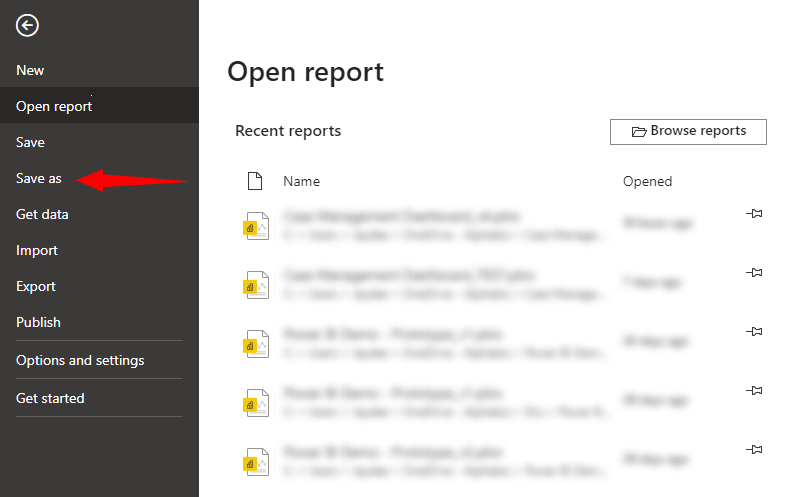
18. Click File then Save As to save the changes made on the pbix file.
Publishing the Report to Power BI Service (Web)
Requirement: From the Microsoft 365 Admin Center, check if the MS account that will be used to publish has an existing Power BI (Free) or Power BI Pro license.

19. Open the Power BI pbix file updated with your data source.
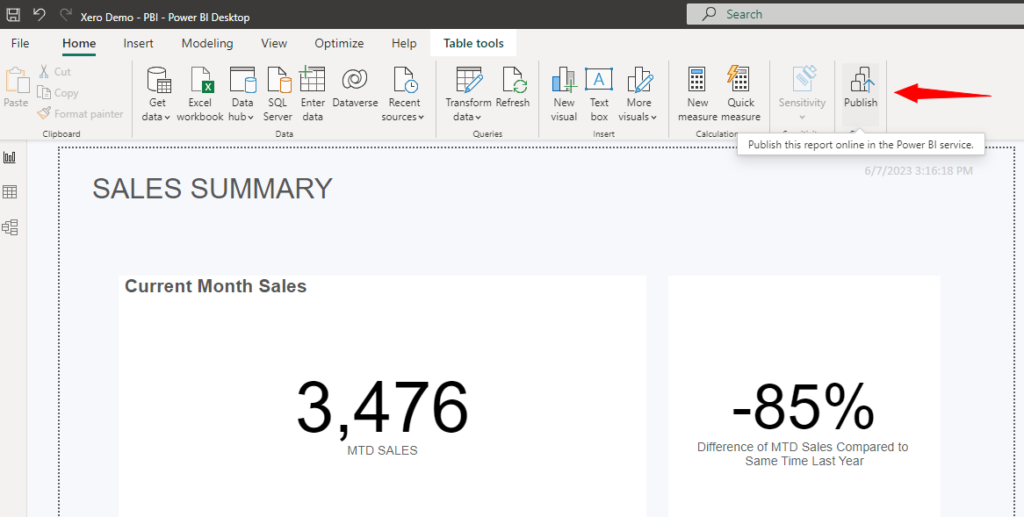
20. From the Home tab, select the Publish button.
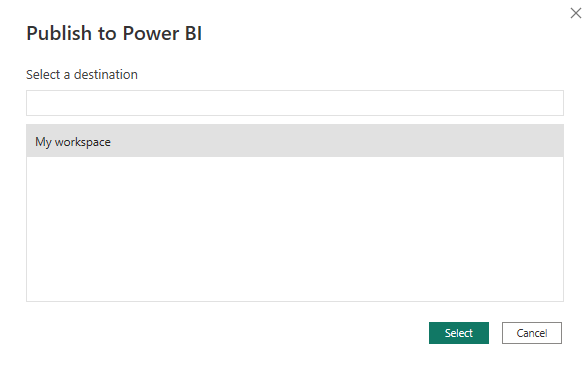
21. Select a destination workspace where your report will be published. By default, if you have no existing workspace or if this is the first time you will publish a report in Power BI, My workspace can be selected. Click Select.
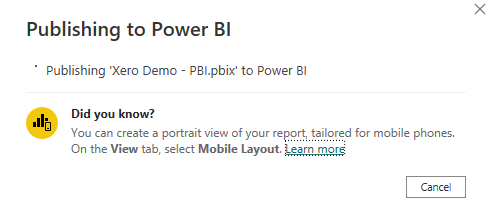
22. Wait for the report to published. A window informing you of the successful publishing will pop-up.

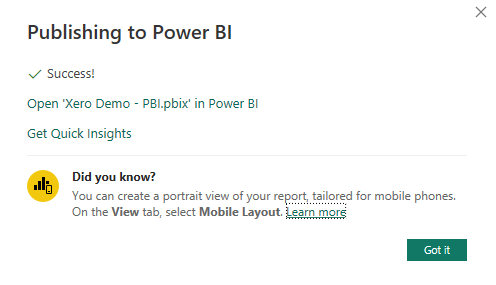
23. To access Power BI Service go to https://app.powerbi.com/ home from your browser
24. Log in using the same MS Account used to publish the report.
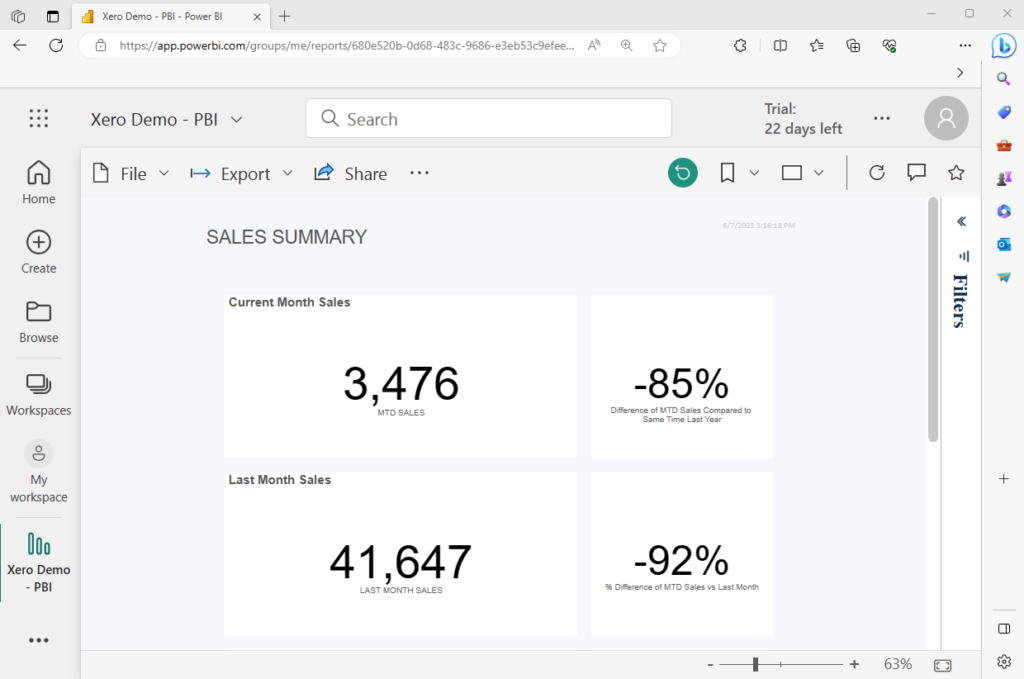
25. From the Home screen, open the workspace where you published the report. Click on the report to view.
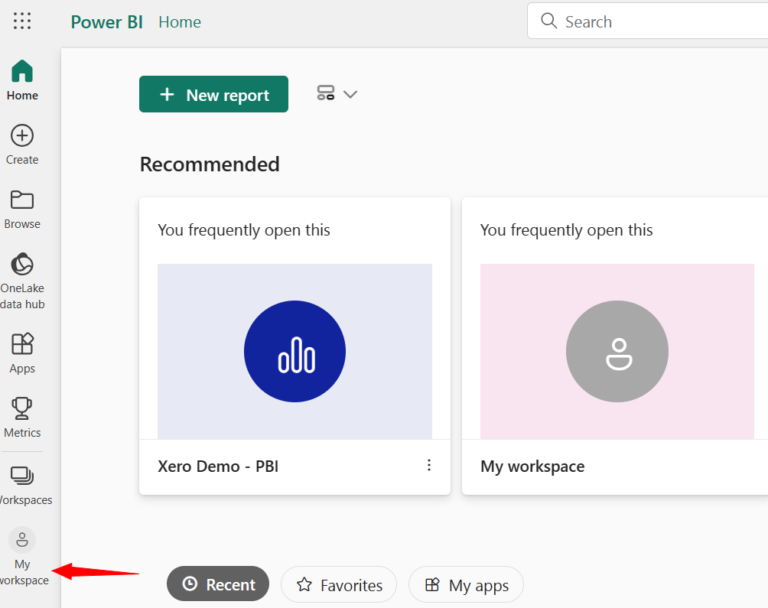
26. The published report can now be viewed online.
Setting up Automatic Refresh Schedule
27. Open the Power BI workspace where the report is published.
28. Under Datasets + dataflows tab, hover on the report name and click the More Options button.

29. Click Settings
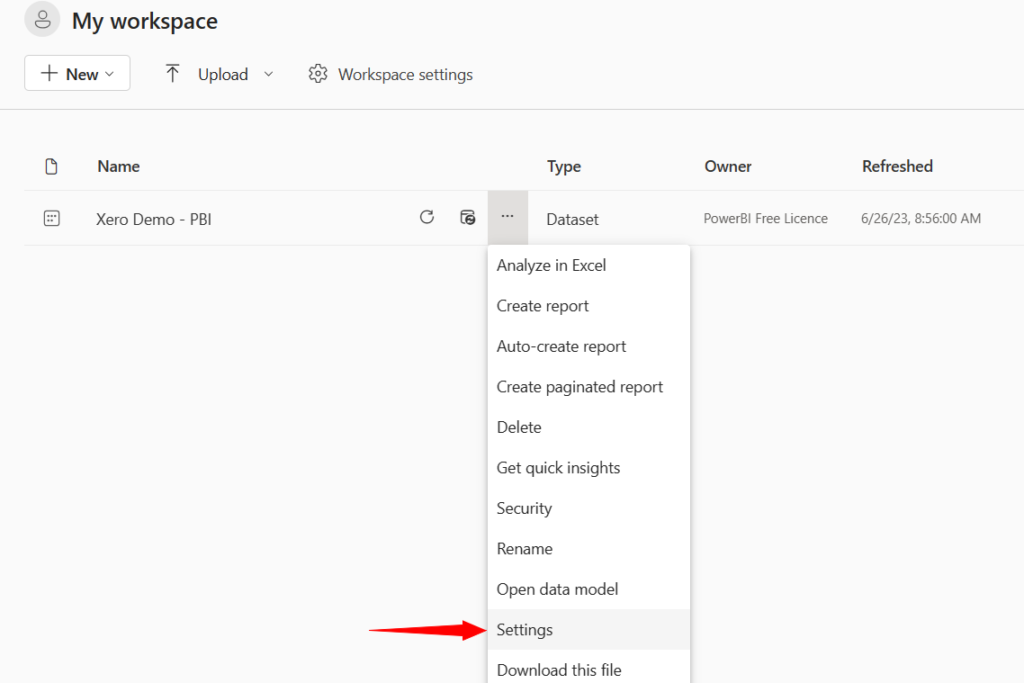
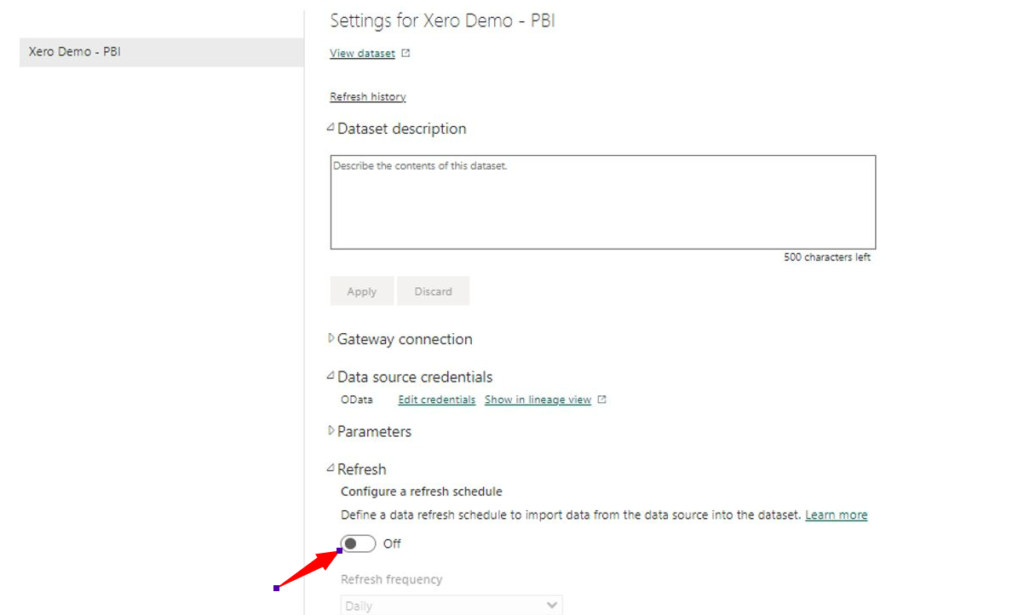
30. Under the Refresh option, toggle the on radio button
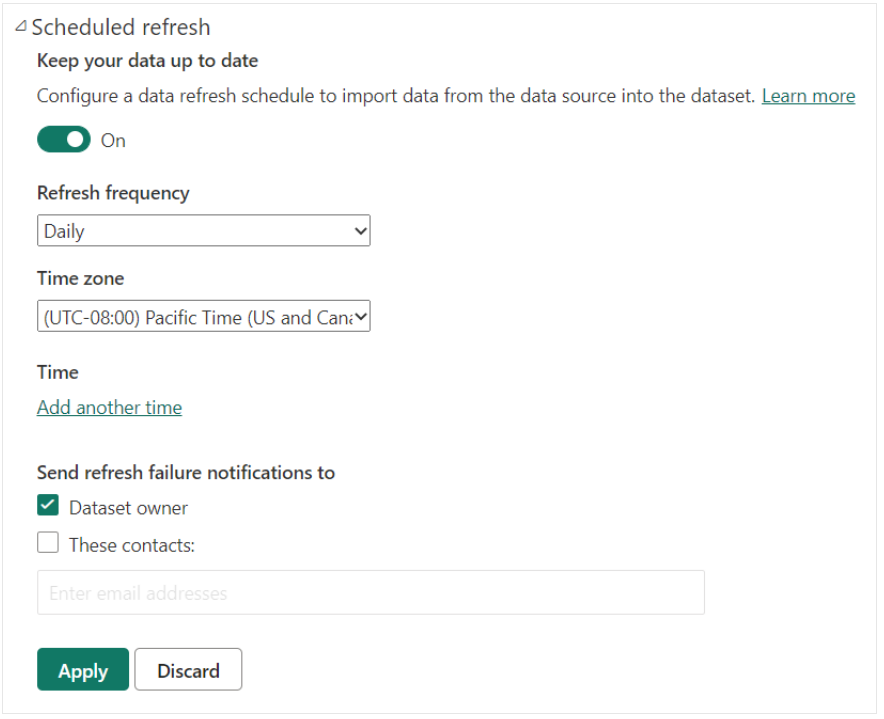
31. Set the frequency for your report refresh. Default settings is Daily but you may opt to add multiple times when your report will be updated. Once done, click Apply.
Opening Power BI in Mobile Device
32. Download the Power BI application from App Store (iOS) or Play Store (Android).

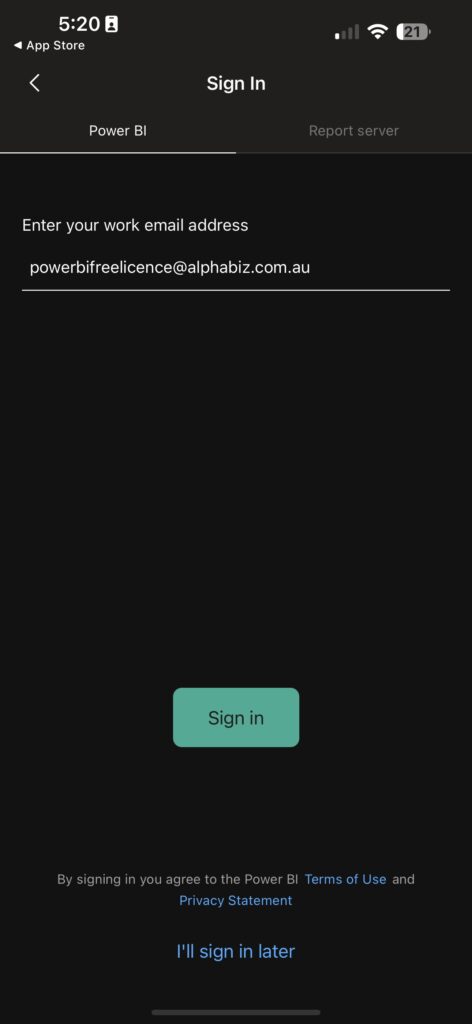
33. Open the app and sign in using the same Microsoft 365 account used to create and publish the Power BI report.
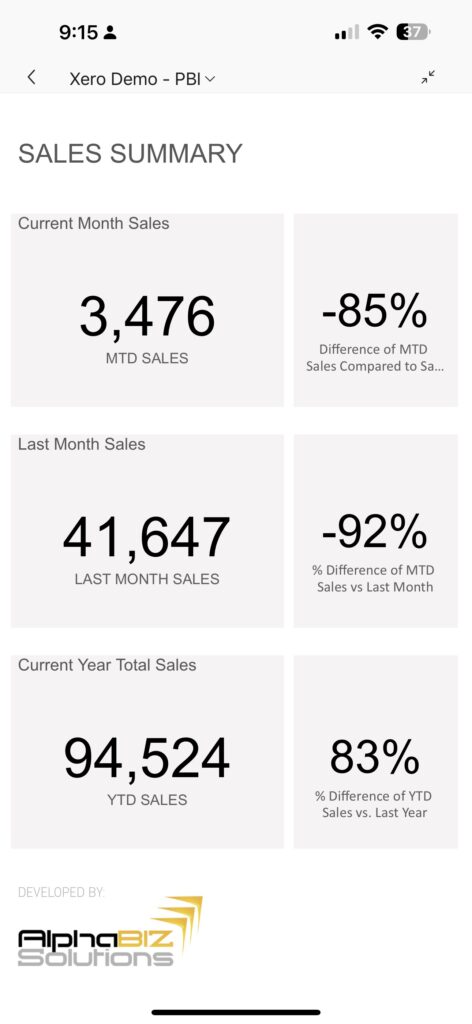
34. You may now access the report via your mobile device.
Report Subscription to Trigger E-mail Notification
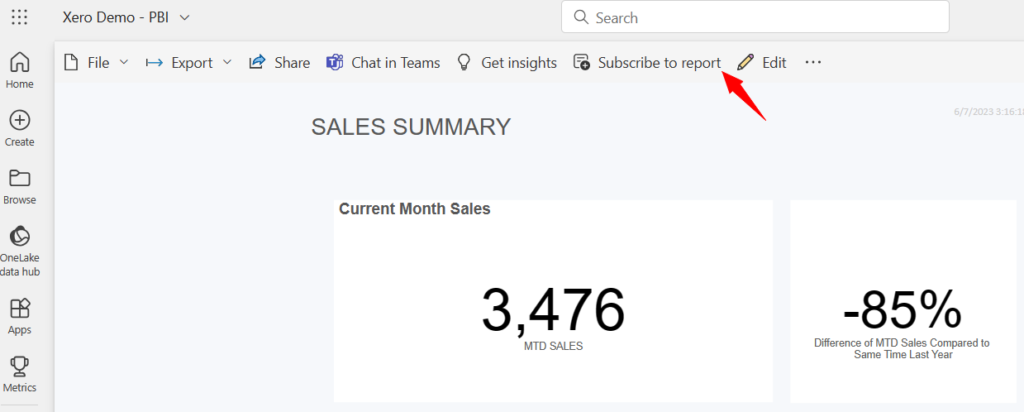
35. Open the dashboard or report, and from the top menu bar, select Subscribe Select the Subscribe to report icon.
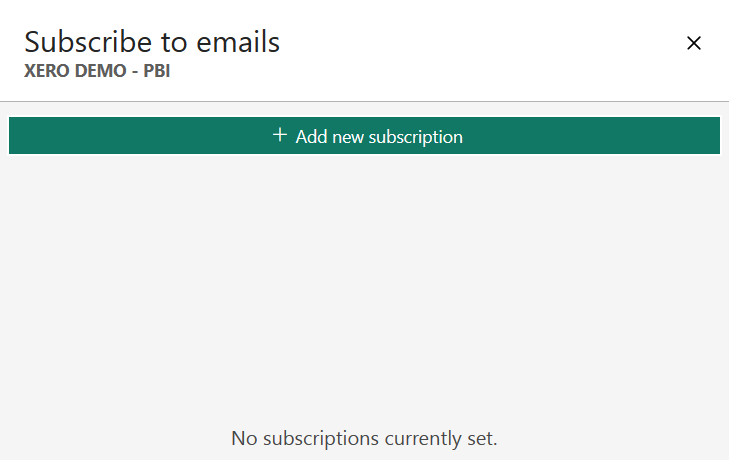
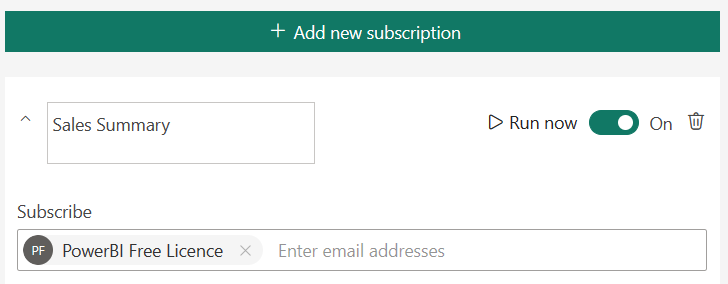
36. Select Add new subscription and give your subscription a name. By default, your subscription is given the same name as your report page or dashboard. Optionally, change the name of the subscription to something more meaningful.
37. Use the slider to turn the subscription on and off. Setting the slider to Off doesn't delete the subscription. To delete the subscription, select the trashcan icon.

38. Edit or add recipients by email address, ensuring that you have at least one. Optionally, add a subject and email message details.
39. Select a Frequency for your subscription. Ideally, ‘After data refresh (Daily)’ is selected.
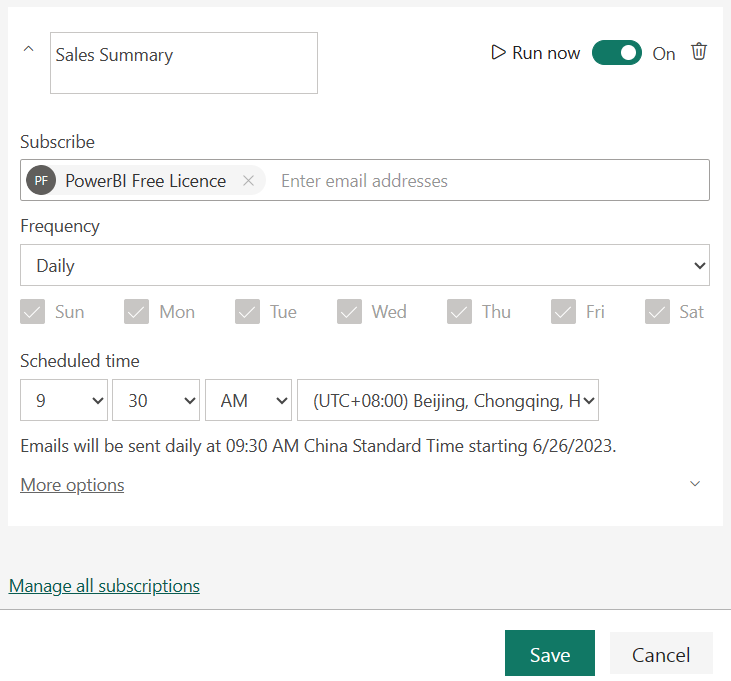
40. If everything looks good, select Save. To test out your subscription, select Run now to send the email to you right away.

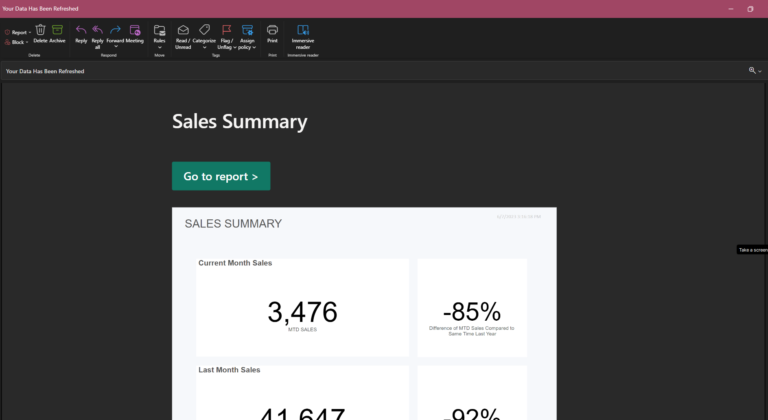
41. You'll now receive an email and snapshot of the report or dashboard on the schedule you set. Subscriptions that have the frequency set to After data refresh will only send an email after the first scheduled refresh on that day.
Setting up Alerts in Power BI
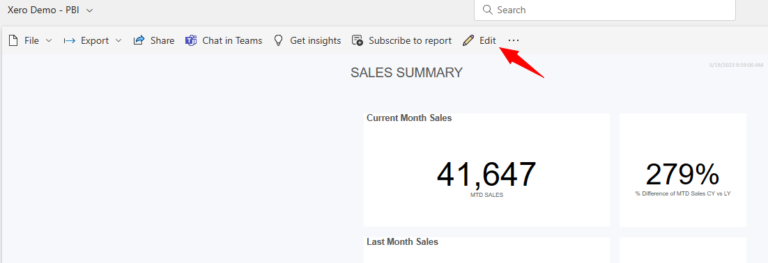
42. Open your published report in Power BI Service then click on Edit from the toolbar.
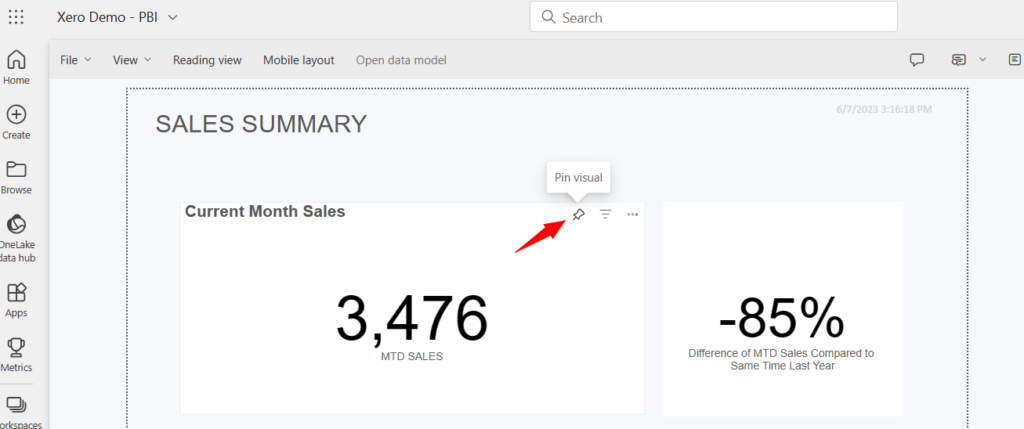
43. Select on a tile you want to pin on your dashboard and click the pin visual icon.
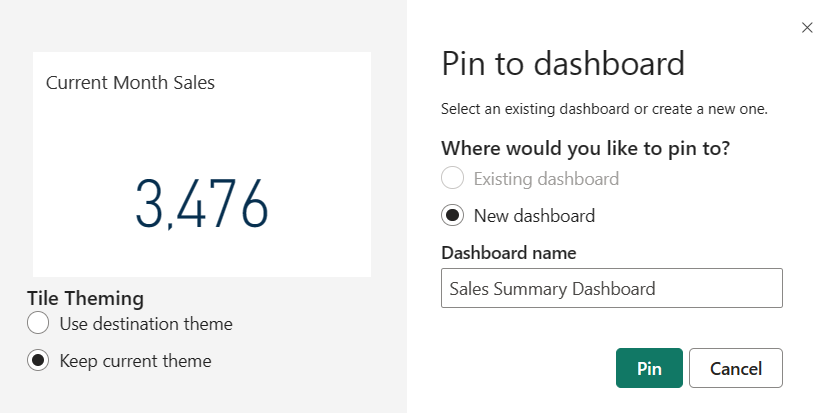
44. Select which existing dashboard you want to pin the tile to. You may also create a new dashboard if needed and click Pin.
45. Click Go to dashboard.

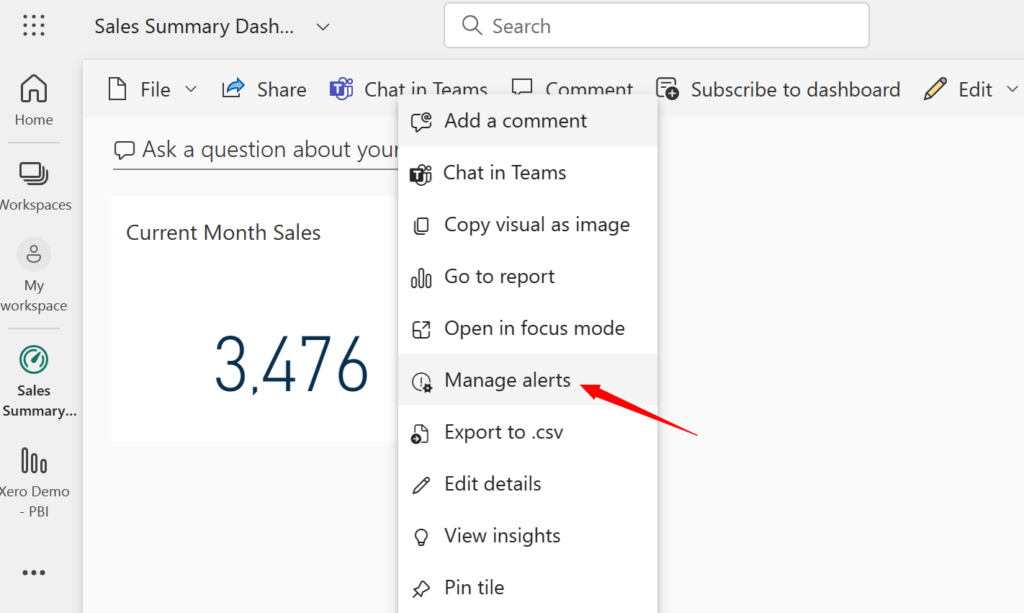
46. From the tile on the dashboard, click the More Options ellipsis button and Manage alerts.
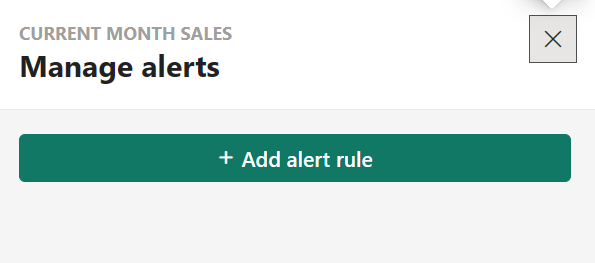
47. From the he Manage Alerts pane click + Add alert rule button
48. Create the alert and set the condition and threshold. You may opt to have the alert sent via email by ticking the Send me email, too option.
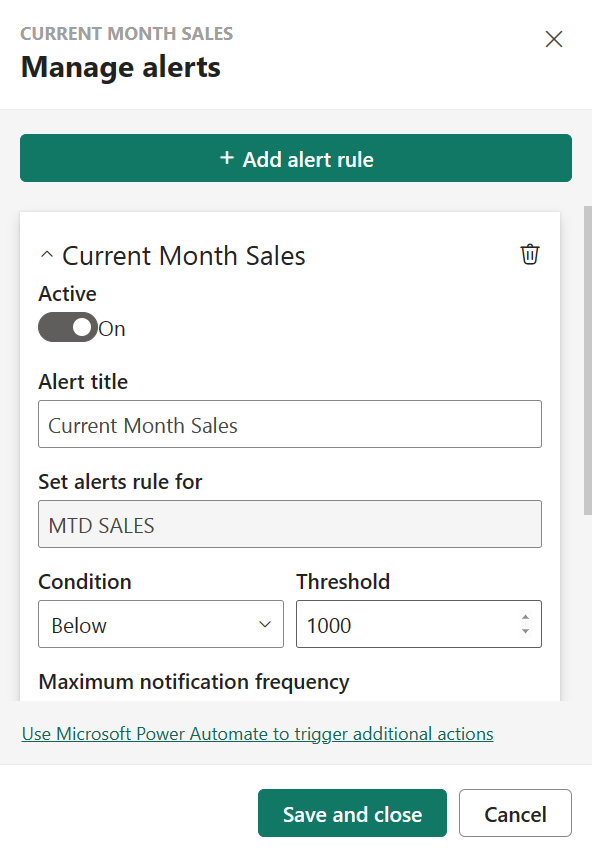
49. Click Save and close.


